As winter’s chill approaches, your brick chimney might be silently signaling for aid. Cracked mortar, loose bricks, and water stains aren’t just cosmetic issues—they’re potential entry points for moisture and structural damage. If left unchecked, these seemingly minor problems can escalate into costly repairs that’ll make your wallet shudder. Ready to protect your home and prevent expensive winter surprises? Let’s investigate how you can restore your chimney’s strength and integrity before the first snowflake falls.
Understanding Chimney Damage and Warning Signs
If you’ve noticed your brick chimney looking worse for wear, it’s crucial to understand the potential damage before winter arrives. Examining weathering patterns helps you identify early signs of deterioration.
Look for cracked or missing mortar, loose bricks, and water stains that might indicate structural weaknesses. Evaluating structural integrity involves checking for leaning walls, visible gaps, or crumbling masonry. These warning signs suggest your chimney needs immediate attention to prevent further damage and potential safety hazards.
Don’t ignore even small signs of wear, as they can quickly escalate into costly repairs. Pittsburgh homeowners can benefit from professional chimney repair services that specialize in addressing these critical maintenance needs before winter arrives.
Essential Tools and Safety Equipment
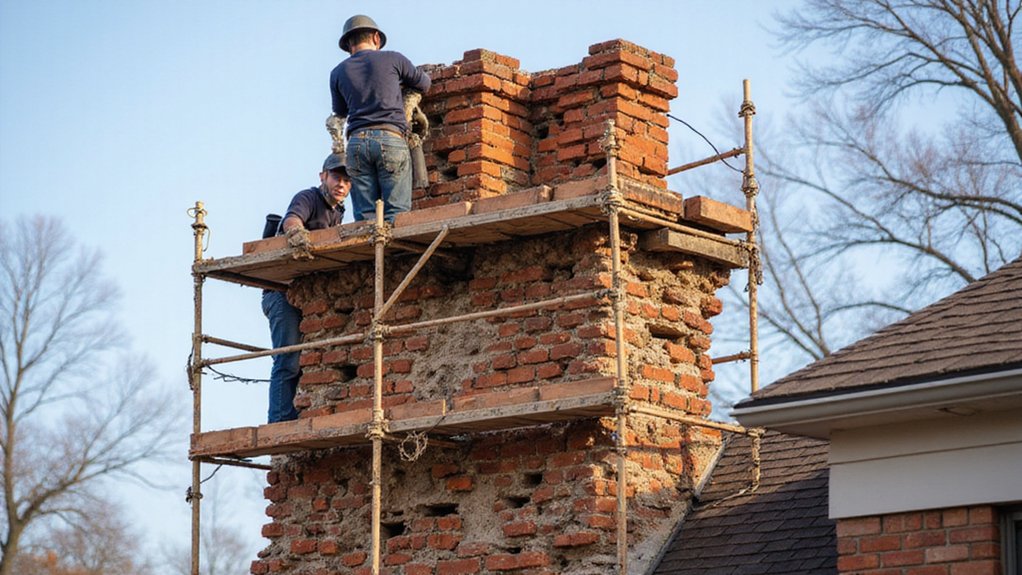
After identifying potential chimney damage, you’ll want to gather the right tools and protective gear before starting any restoration work. You’ll need safety glasses, work gloves, a sturdy ladder, and a dust mask to protect yourself.
Prepare your work area by laying drop cloths around the base of the chimney and clearing nearby spaces. Essential tools include a masonry hammer, cold chisel, wire brush, trowel, and mortar mix. Don’t forget scaffolding or sturdy platforms for safe access to higher sections. Chimney repair experts recommend professional assessment if the damage appears extensive or complex.
Prioritize your safety to guarantee a successful chimney restoration project.
Cleaning and Preparing the Chimney Surface
Since a clean surface is essential for effective chimney restoration, you’ll want to thoroughly remove dirt, debris, and loose mortar before beginning repairs. You’ll need to start with basic masonry cleaning techniques like wire brushing and scraping to prepare the surface.
High pressure washing methods can be effective for removing stubborn grime, but you’ll want to use moderate pressure to avoid damaging the brickwork. Carefully inspect the surface for cracks, chips, or areas of deterioration that might require additional attention during your restoration project.
Repairing Mortar Joints With Tuckpointing
When your chimney’s mortar joints start to crumble and deteriorate, tuckpointing becomes an essential restoration technique that can save you from costly future repairs. By carefully evaluating mortar condition, you’ll determine the extent of damage and prepare for applying the tuckpointing technique effectively.
Key steps for successful tuckpointing include:
- Removing damaged mortar with specialized tools
- Cleaning joint surfaces thoroughly
- Selecting matching mortar color and consistency
- Filling joints with precision and care
- Smoothing and finishing new mortar joints
Your careful restoration will protect your chimney’s structural integrity and prevent potential water damage.
Replacing Damaged Bricks and Structural Reinforcement
How badly has brick damage compromised your chimney’s stability? When cracks and structural issues emerge, you’ll need to act quickly. Patching cracked bricks isn’t just about appearance—it’s about preventing further deterioration.
You’ll want to carefully remove damaged bricks, ensuring you don’t destabilize surrounding masonry. Rebuilding damaged sections requires precision and the right tools: a cold chisel, hammer, replacement bricks, and mortar. Professional masons recommend matching new bricks to existing ones for seamless integration.
Applying Waterproofing and Protective Sealants
Every homeowner knows that safeguarding your brick chimney from water damage is indispensable before winter arrives. Protecting your chimney’s structural integrity requires careful sealing brick surfaces and applying waterproof coatings that prevent moisture penetration.
- Choose a high-quality silane/siloxane-based waterproofing solution
- Clean surfaces thoroughly before application
- Apply sealant evenly with a roller or sprayer
- Allow complete drying between coats
- Inspect and reapply protective layers annually
These protective measures will help your chimney withstand harsh winter conditions, preventing costly water-related repairs and maintaining your home’s structural health. Professional application guarantees maximum effectiveness and long-lasting protection.
Inspecting Chimney Cap and Flashing
After protecting your brick chimney’s surface with waterproofing sealants, your next critical inspection focuses on the chimney cap and flashing—two components that play a major role in preventing water intrusion.
When inspecting chimney ventilation, check that your cap allows proper air circulation while blocking debris and animals. You’ll want to examine the flashing, which seals the intersection between your chimney and roof, ensuring no gaps exist that could lead to leaks.
Inspecting chimney stability means verifying these protective elements are securely fastened and undamaged, safeguarding your home from potential water damage and structural issues.
Maintenance Tips to Prevent Future Deterioration
Brick chimney warriors, take heart: routine maintenance is your best defense against structural decay. By staying proactive, you’ll prevent costly repairs and extend your chimney’s lifespan.
- Regularly inspect ventilation points for blockages
- Check moisture levels around brick surfaces
- Schedule annual professional chimney assessments
- Apply waterproof sealant every three years
- Clean chimney crown and remove debris
Your diligence matters. Catching small issues early prevents significant structural problems, saving you money and preserving your home’s integrity. Remember, a well-maintained chimney isn’t just about appearance—it’s about safety, efficiency, and protecting your most cherished investment.
Frequently Asked Questions
How Long Does a Professional Chimney Restoration Typically Take?
You’ll find a professional chimney restoration typically takes 1-3 days, depending on damage complexity. Your chimney cleaning process and specific repair timeline can vary based on structural needs and required work.
What’s the Average Cost of Repairing a Brick Chimney?
You’ll typically spend $500-$3,000 on brick chimney repairs, with restoration costs varying by damage complexity. Your project’s price depends on mortar replacement, crack repair, and structural issues affecting your home’s integrity.
Can I Restore My Chimney Myself or Need a Professional?
You’ll want a pro for complex repairs, but minor damage like mortar cracks you can tackle. Identifying chimney damage early and using common repair techniques can save you money and protect your home.
How Often Should Chimneys Be Inspected and Restored?
You’ll want annual maintenance and routine inspections every year to apprehend potential chimney issues early. Professionals recommend a thorough check before winter to guarantee your home’s safety and impede costly repairs.
Will Chimney Restoration Increase My Home’s Overall Property Value?
You’ll elevate your home’s value with a restored chimney, increasing home appeal and amplified property aesthetics that attract potential buyers and cultivate a sense of satisfaction in your well-maintained residence.